What You See After You Sign In #
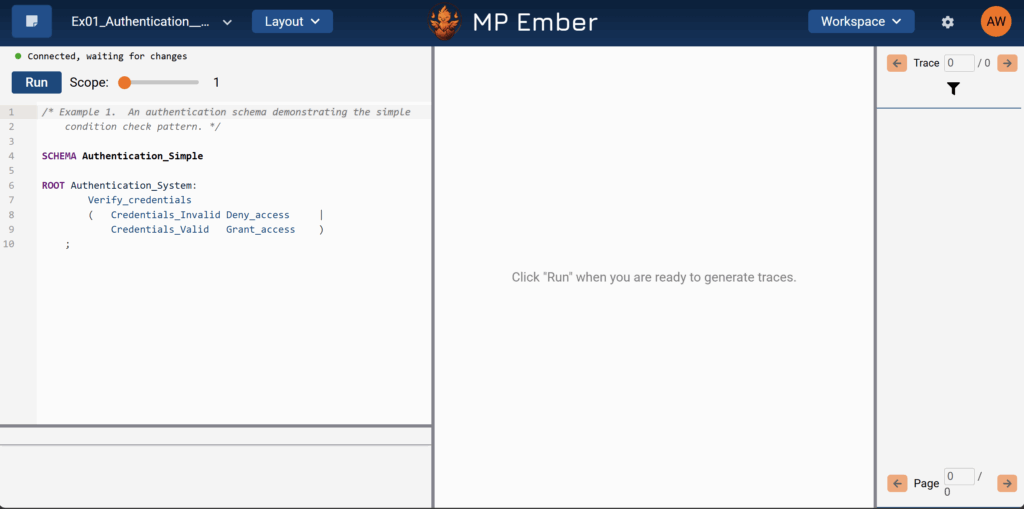
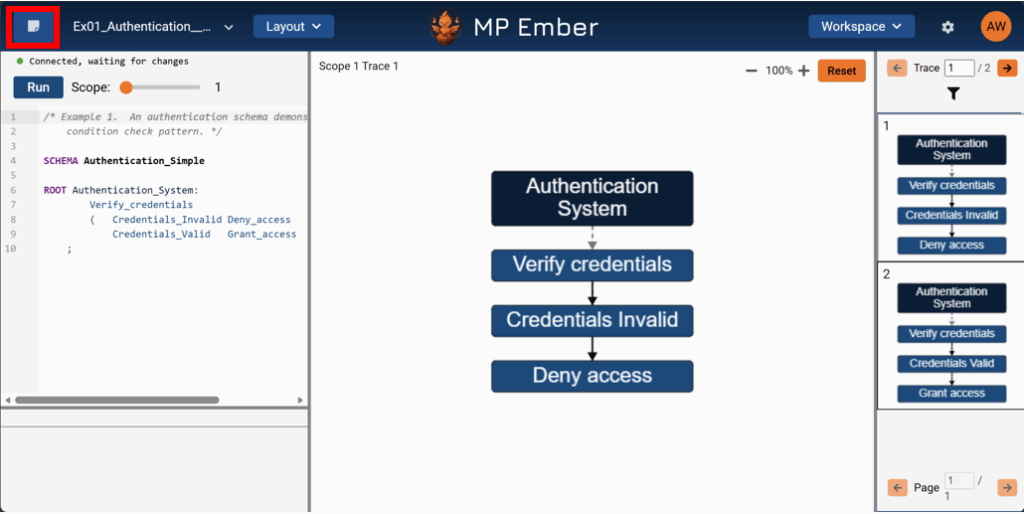
When you open MP Ember, you land in the workspace: the main screen where you edit your MP model, run it, and view traces. This page is the home for your day-to-day work. The rest of the Help Center explains each part in depth; this article is a quick map of the screen and the main controls around the edges.
Main Layout: Editor, graph, and traces #
The workspace is usually split into a few panes you’ll use together:
Editor (left): The text area where your MP model lives as a text schema. This is where you type, paste, and refine your work.
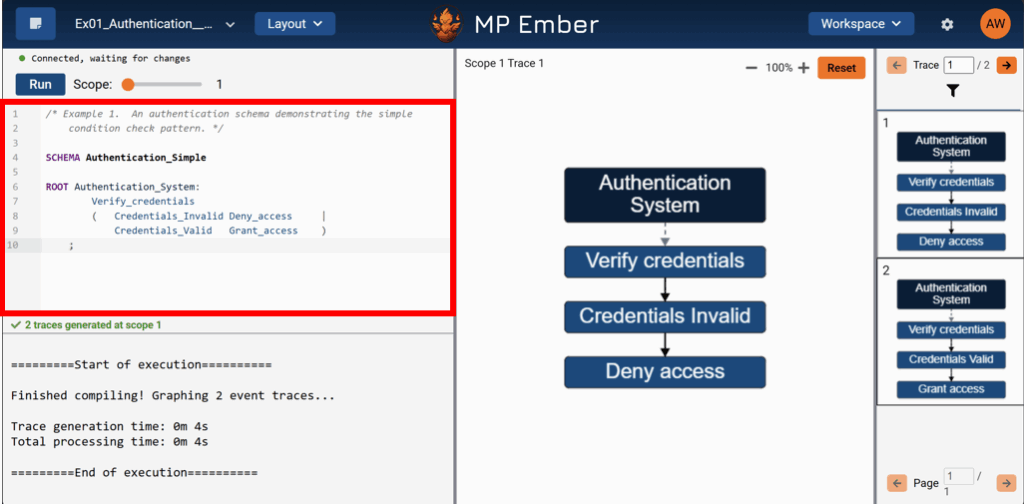
Graph (center): A visual of the structure the app extracts from your model (example traces), so you can see examples how different pieces of your behavior model can connect and relate.
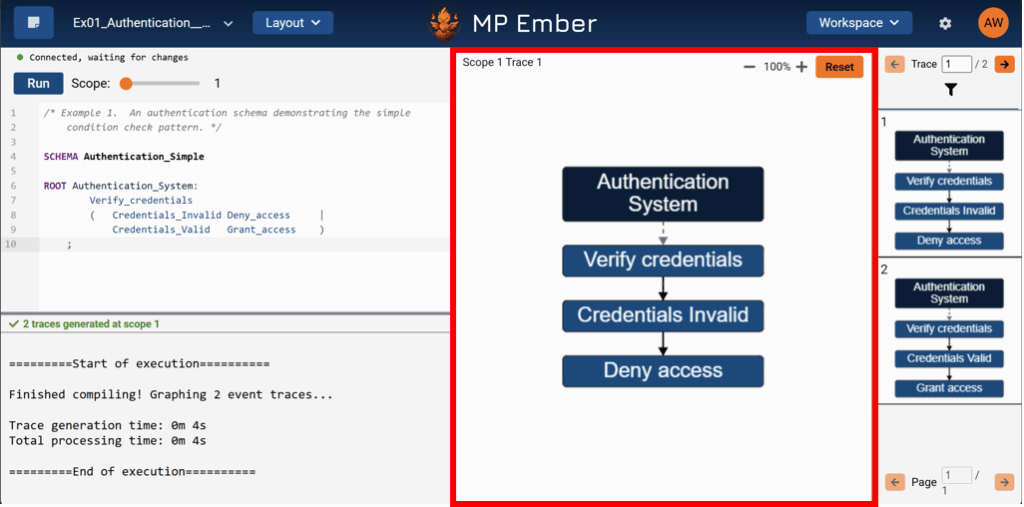
Trace List (right): A column of image thumbnails that you can move through and inspect. Choosing different traces updates what you see in the center Graph pane.

Workspaces and Organization Context #
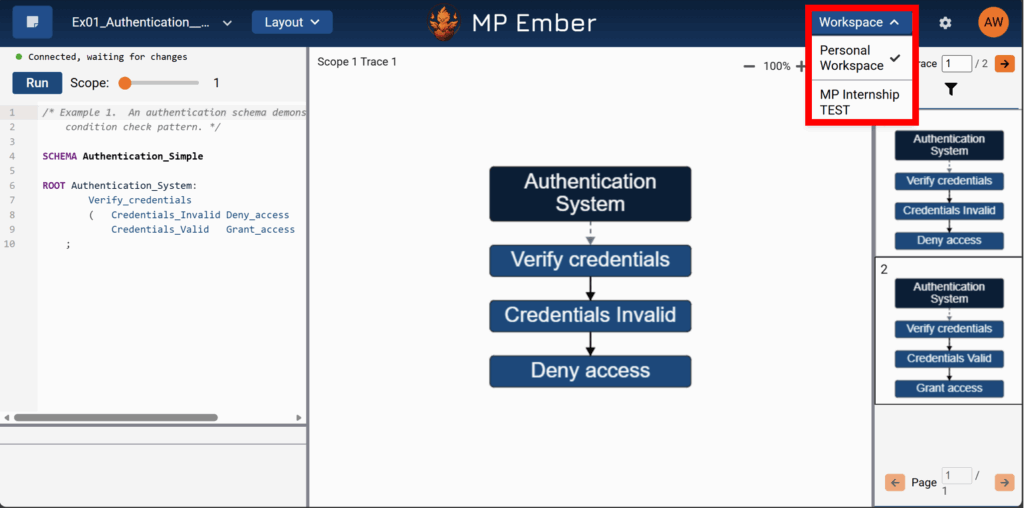
If your team uses organizations, you may see a way to switch the workspace you’re in via a dropdown menu (near the top right). The workspace you choose can determine which projects and data you’re working with, similar to changing context between teams or accounts.
For details on how to join or switch workspaces, see the articles about organizations and your account. Here, the important idea is: if you don’t see the project(s) you expect, check that you’re in the right workspace first.
Header Basics: How to read the top of the screen #
The header runs along the top and holds the main menus and toggles you’ll use on almost every visit. You don’t need to master them yet – just know what each area is for:

Modes:
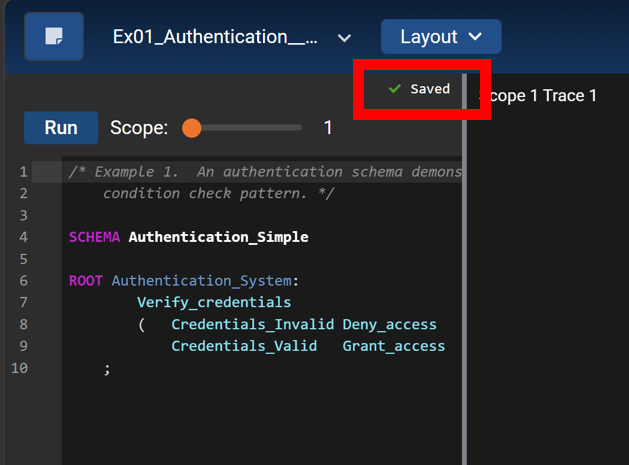
The app can treat your work as a saved project or a scratch pad for quick tries. The control that switches between Project and Scratch Pad modes is a toggle button (top left).
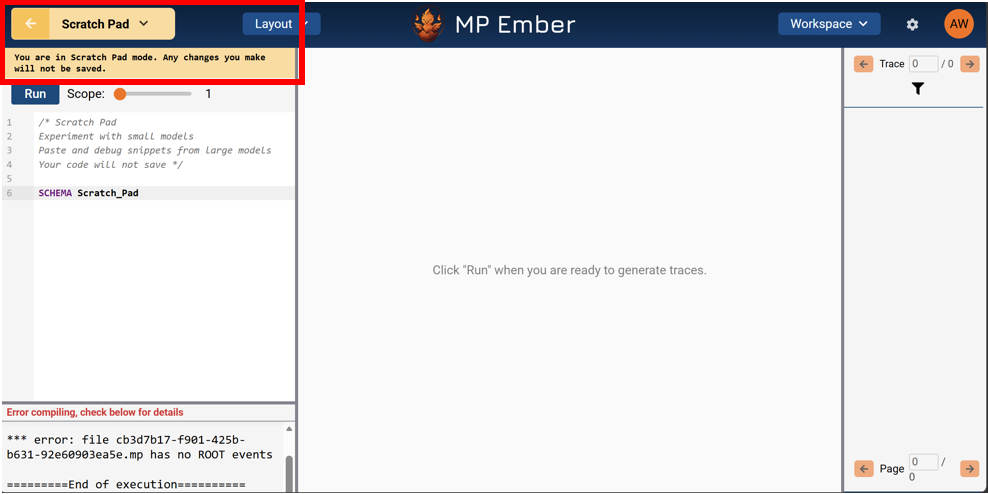
Scratch Pad Mode:
When you are in this mode, your model will not be saved beyond temporary browser cache. This mode is for temporarily viewing examples and experimenting with small models or code snippets from larger models that you do not necessarily want to save as its own separate project (to keep clutter out of your project folders). If you do decide you want to keep a model you are working in Scratch Pad mode, there are options in its drop down to save it as a project or export it.
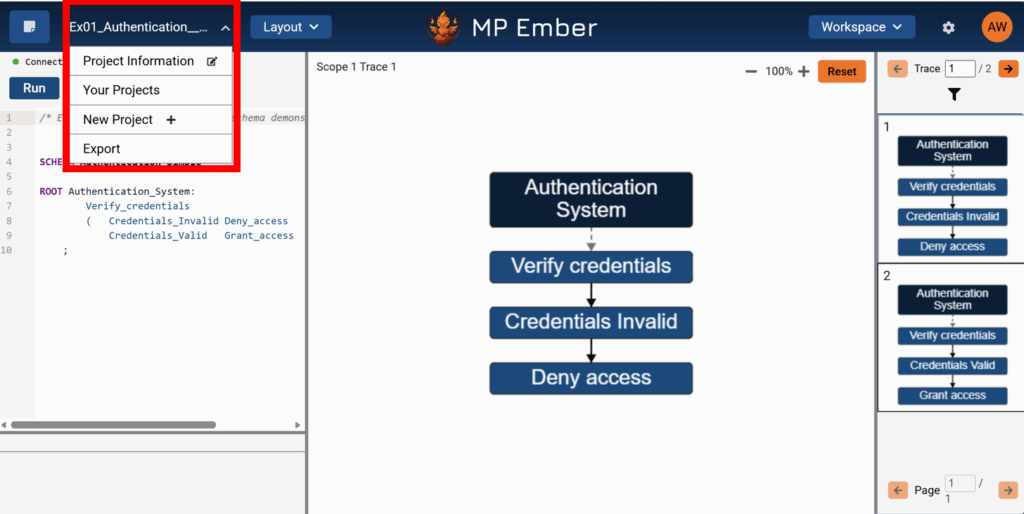
Project Mode:
When you are in this mode, you can open menus tied to the current project (the dropdown directly to the right of the mode toggle button – for example, project information, your projects, new project, and export). Work done in the editor in Project Mode auto-saves to your account – no additional saving or exporting is required.
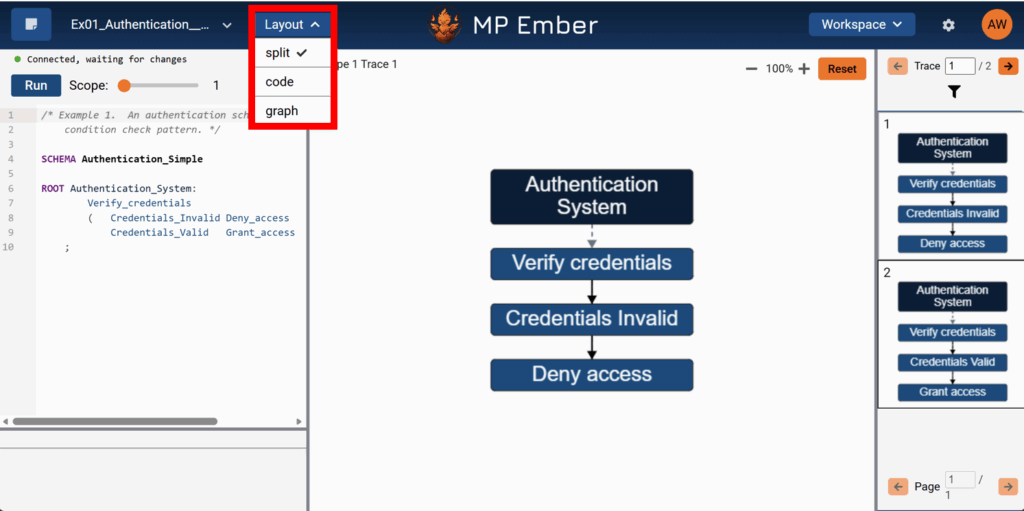
Layout:
The Layout dropdown above the Editor controls how much of the workspace is used to show the editor versus the graph (for example, a split view, a code-focused view, or a graph-focused view).
Workspace (if shown):
The Workspace dropdown enables you to switch workspace context, as described in the previous section. Each organization you belong to has its own workspace. You may not see this dropdown if you do not belong to any organizations.
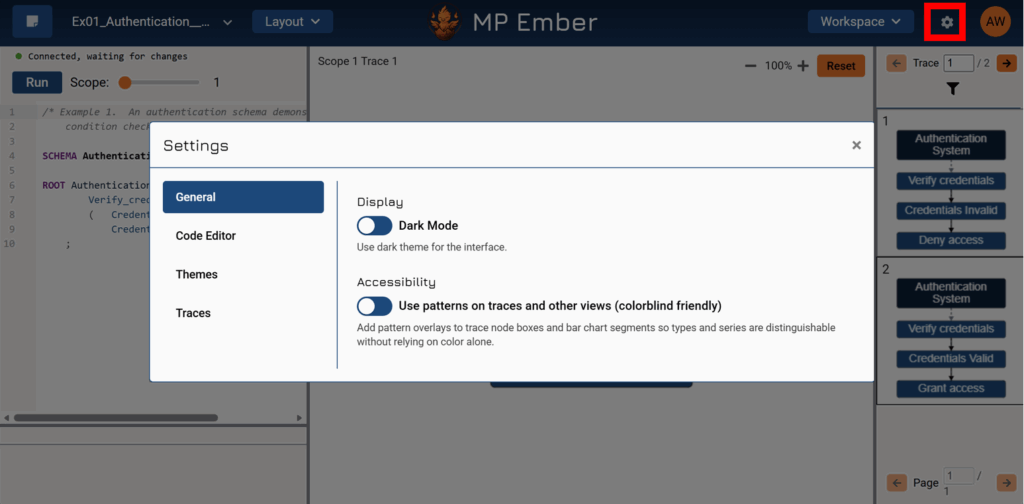
Settings:
The gear icon near the top right opens preferences for the app (for example, light/dark mode, editor options, and themes).
Account & Profile Icon:
The circle with your initials in the top right is a dropdown that lets you view and edit your Account information, view About and Help information, and Logout of the tool. If you were added as an Organization Manager to an organization, you will also see a Managed Orgs menu item that lets you view the organizations you manage.

Other header items may be added as features roll out; this article covers just the familiar landmarks, so first-time users can quickly orient.
