Summary #
Import brings model content into MP Ember from a file or a built-in example. Export saves what you are working on to your computer as a file you can share, archive, or open again later.
How you import depends on whether you are in Project mode or Scratch Pad mode. Export is available in both modes from the top-left menu, but what gets saved depends on the format you choose.
Project Mode vs Scratch Pad Mode
#
| Project Mode | Scratch Pad Mode | |
|---|---|---|
| What you are working on | A saved project (name in the top-left) | Temporary scratch pad work (not a saved project until you save it) |
| Import | Creates or replaces content as a new project (via New Project) | Replaces scratch pad content (via Import) |
| Export | Export from the project menu | Export from the scratch pad menu |
| Auto-save | Projects are saved automatically | Scratch pad is not a project until you save it |
File Types at a Glance #
MP Ember supports three export formats and two import formats for models:
| Format | What it contains | Typical Use |
|---|---|---|
| .mp | Model code only | Share or archive source text; open in any text editor |
| .wng | Code and graph data (layout and related saved graph state) | Move a model between sessions or machines with graphs preserved |
| .png | An image of the currently selected trace | Reports, slides, or documentation |
Importing Projects #
In Project mode (saved projects) #
Importing a file creates a new project; it does not replace the project you already have open.
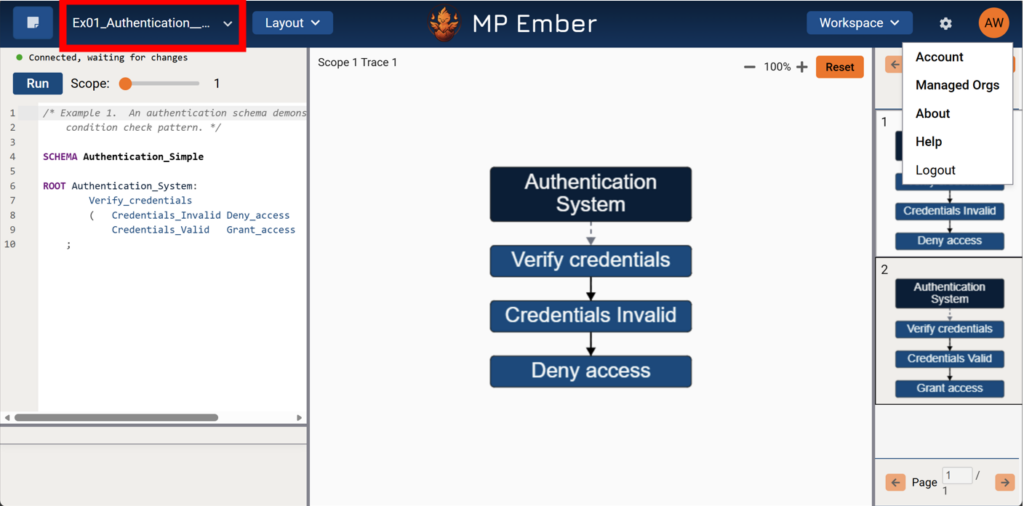
1. Click your project name in the top-left.
2. Choose New Project.
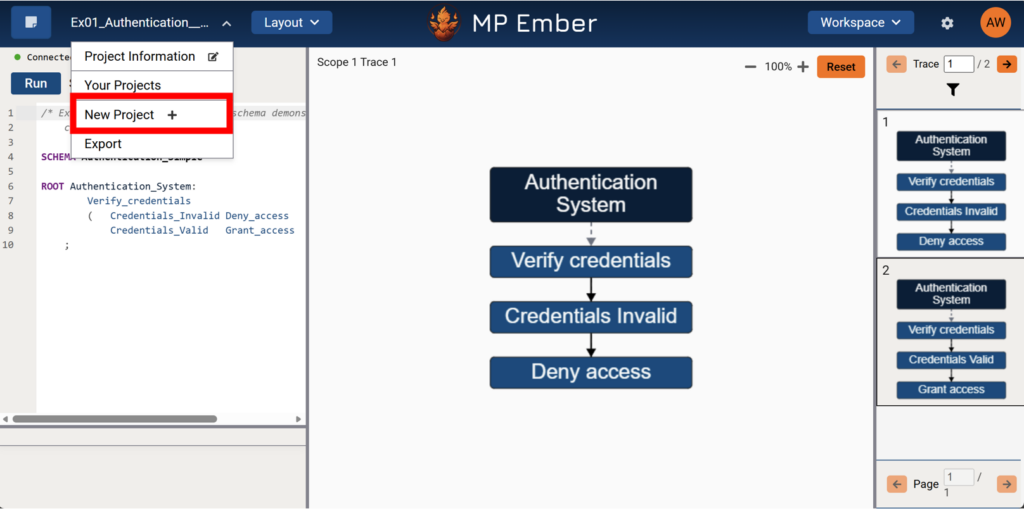
3. Pick From File Upload or From Example.
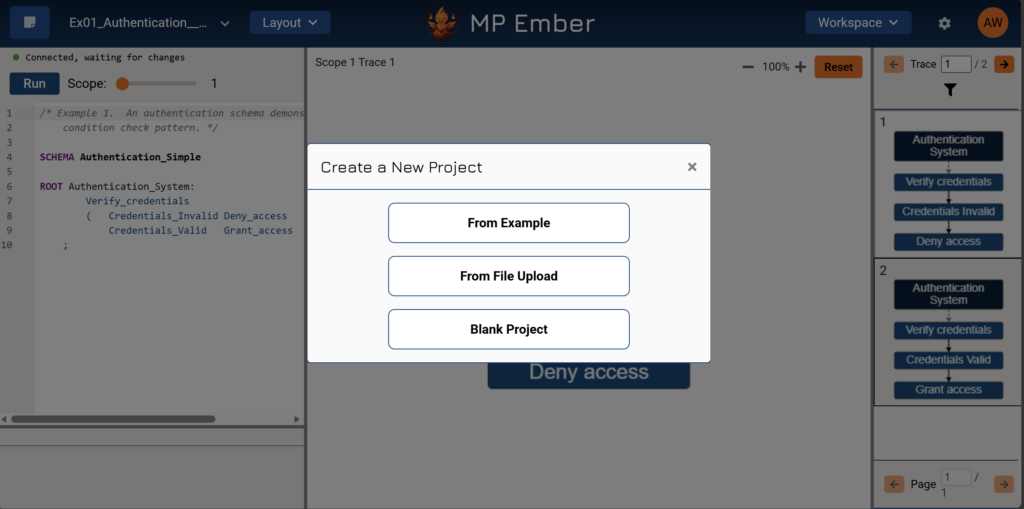
4. Follow the prompts and click Create.
- The new project opens when creation finishes. Your previous project remains in Your Projects unless you delete it.
- For a blank project or examples only, see Create a New Project.
- You cannot start a New Project while a compiler job is running; wait for the run to finish or cancel it first.
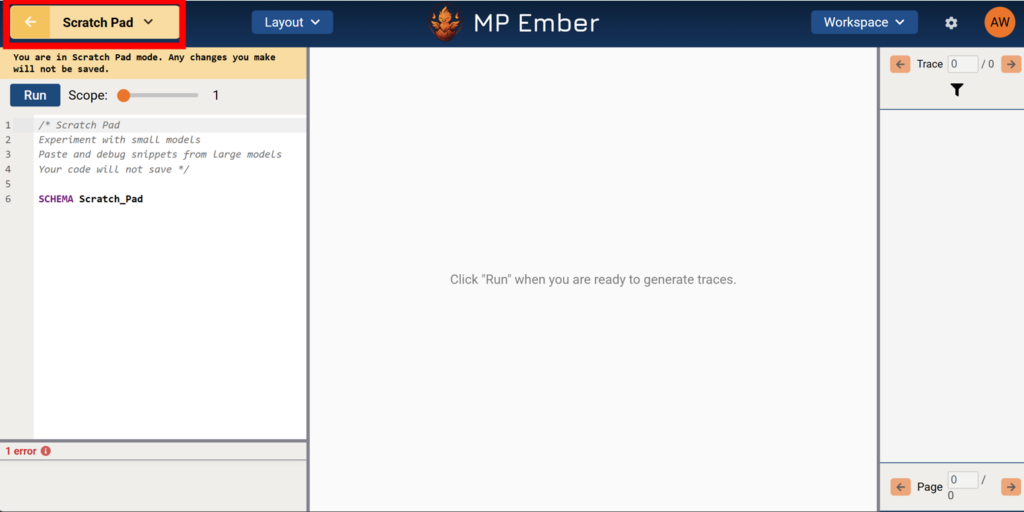
In Scratch Pad mode (temporary work) #
Importing replaces the current scratch pad editor and graph state.
1. Click Scratch Pad in the top-left.
2. Choose Import.

3. On the Import screen, choose From File Upload or From Example.
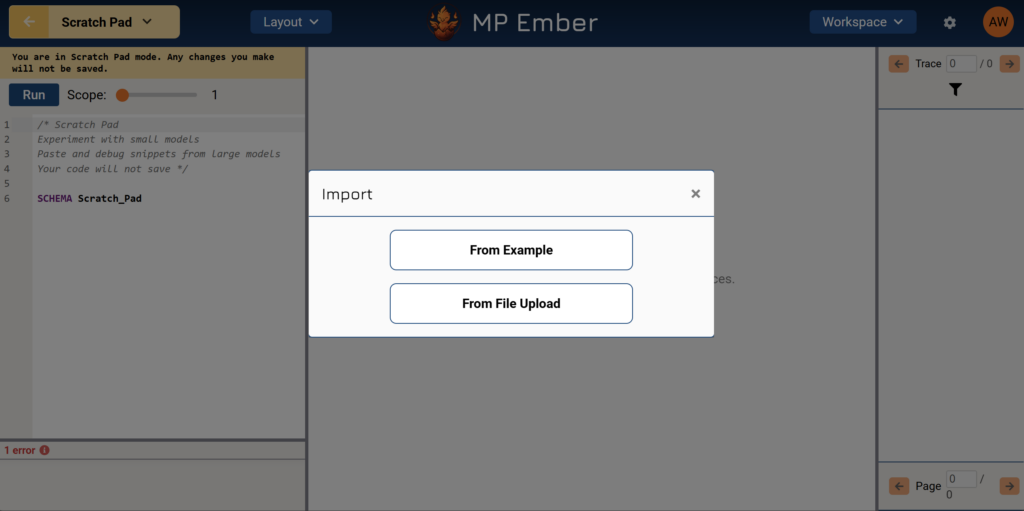
4. For a file: select a .mp or .wng file and click Import. For an example: expand a folder, click an example name (it loads immediately).
- If you have changed the scratch pad from its default content, the app may ask Discard Scratch Pad changes? Importing replaces your work and cannot be undone. Choose Continue to proceed or Cancel to keep your current scratch pad.
- To keep scratch pad work permanently, use Save as Project instead of only importing (see the article on Scratch Pad Mode).
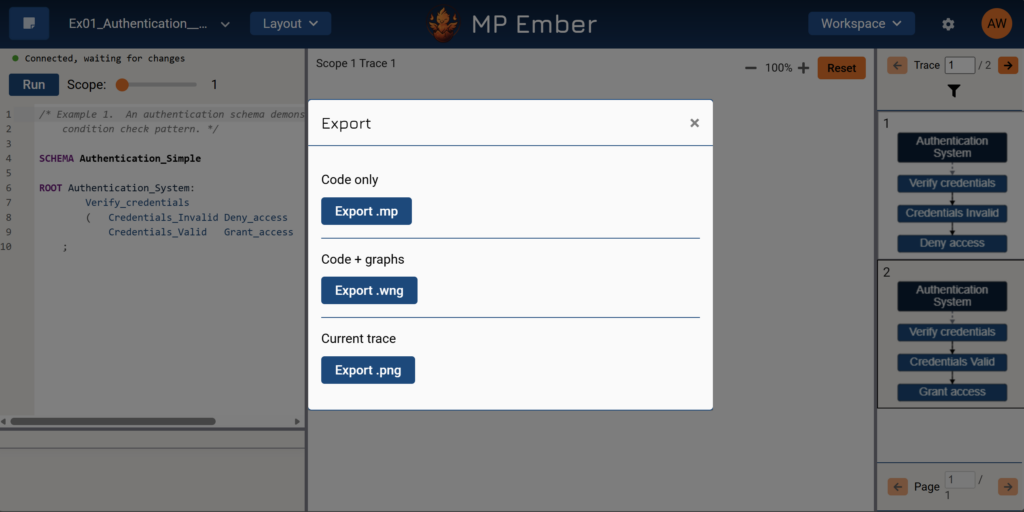
Exporting Projects #
Export downloads a file to your computer. It does not remove anything from MP Ember.
Open the Export dialog
Project Mode
- Click your project name in the top-left.
- Choose Export.
Scratch Pad Mode
- Click Scratch Pad in the top-left.
- Choose Export.
Export options #
The Export dialog offers up to three choices, depending on what is available in the workspace:
| Label in the Dialog | Button | What you get |
|---|---|---|
| Code only | Export .mp | Current model code saved as a .mp file. Graph layout is not included. |
| Code + graphs | Export .wng | Code and graph-related data is saved in a .wng file. |
| Current trace | Export .png | Saves a PNG image of the trace you have selected in the graph area. Shown only when a trace is selected. |
Common Workflows #
- Share Code With a Colleague (no graphs)
- Export .mp from Project or Scratch Pad; they can import via New Project (project mode) or Import (scratch pad).
- Move a Full Model with Graphs
- Export .wng, then create a new project from that file (New Project → From File Upload) or import into the Scratch Pad.
- Get an Image of One Trace for Use in a Document
- Select the trace in the graph pane on the right, open Export, choose Export .png, and pick a size.
- Try a Sample Model Without Saving First
- Scratch Pad: Import → From Example. To save it later: Save as Project.
Tips #
- .mp vs .wng: Use .mp when you only need the model text. Use .wng when the graph layout and related saved graph data matter.
- Invalid file errors: Import accepts only .mp and .wng. A .wng file is a JSON file formatted for this app.
- PNG export: Select the trace you want in the graph area before opening Export; the Current trace row appears when a trace is selected.
- Scratch Pad import overwrites current content: Treat import like replacing the document; save as a project first if you need to keep the current scratch pad.
